My Lockdown Project
Lockdown Project Part 2

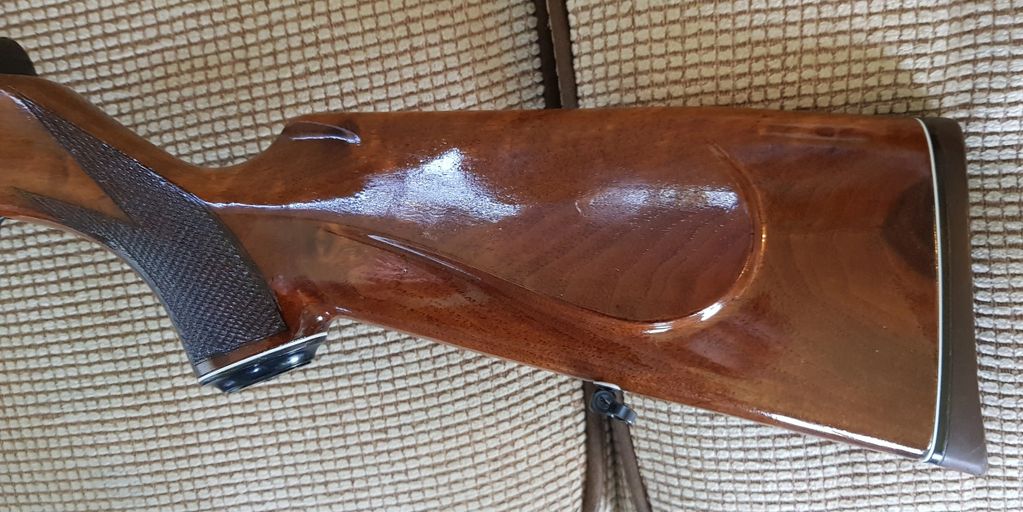
Here is part 2 of the project and my first attempt at putting some life back in to a Stock. I knew there was some beauty in that lump of wood hidden beneath the bruises.

It took me almost a week of stripping, sanding and applying the different layers to get to this. Keep in mind my level of ability to work is probably 2 hours a day spread out over the day, not continuous. This works well as each layer needs a bit of time to dry out before the next is applied.

There were a lot of bumps and bruises here which I got out using a tried and tested method of damp cloth and an iron. Another of those things I knew of but had never tried myself.

I did consider going for a bit more red in the stain but decided I much prefer this colour. The contrast in the shading was just appealing to my eyes.

The light just shows some of the imperfections in the finish but I never expected to get it perfect. It jsut needed to be usable but not be rough like it was a bunch of bits thrown together...Oh..okay...it was a bunch of bits.

The white spacers were almost black with many years of crud so a bit of a light sanding bought them back up.
Here it is, stock done. (Until Stan see's it and does it better. )
The action is in just for me to test out it working. It certainly works but needs a bit more fettling. That is going to be part 3. It might be a little longer until that is complete as I'm awaiting on delivery of some extra bi
Restoration Project Pt.3 The Saga Continues

So, this lockdown is dragging on and with no where to shoot at the moment, I have plenty of time on my hands to do some extra fettling to see if I can get even more out of this 40 year old gun. I'm a firm believer that a rifle will shooter far better with a few internal improvements along with the previously mentioned TBT tuning kit.

In these 2 pictures you can see the cylinder and back block along with the piston, the silver coloured part. Looking at the block its hard to see that it has grooves going around the inner surface and the cut out sections in the cylinder have years of bangs and scrapes where mental impacts on metal. Smoothing all those out can only make the action smoother and quieter.

Now you can compare the after pictures to the above to see that I achieved a nice smooth surface for the parts to run against. This was done using a dremel to attatck the heavy lumps then changing to emery cloth and needle files before going to different grades of wet and dry paper but rather than water, using light oil as a surface lubricant.

The barrel lever link runs through these to push the piston up to engage the trigger sears. When it comes to the rebuild, these will get a coating of Moly grease to reduce the friction.

Once the rebuild of the rifle was done, I then thought I could Pimp My Rifle but adding some brass furnishings. Some parts are available from different suppliers around the interweb. Some just need a few tools to make oneself so some brass sheet was ordered.
This shows the template in white for the grip cap spacer. I think that brass part was the left over part , used for the picture after I had fi

A bit of dremel work then some filing before the finish with 340, 800 and 1000 grade paper.
Cookie Policy
This website uses cookies. By continuing to use this site, you accept our use of cookies. Privacy Policy
